In this previous post I wrote about how much I LOVE getting a weekly milk delivery. It has inspired me to make cheese! I have made Ricotta Cheese before so I know if you have good instructions and fresh ingredients, not only is it not THAT difficult to make but the end rewards are so HUGE! One of my family’s favorite cheese is Burrata. Burrata is an Italian cheese that is pretty much a mozzarrella pouch filled with a cream mixture. The terms “burrata” means “buttered” in Italian. It is like eating fresh mozzarella turned up a notch.
I read a bunch of different recipes and watched a few videos on how to make burrata and here is how I do it.
This is what a Burrata shaped into a purse looks like: 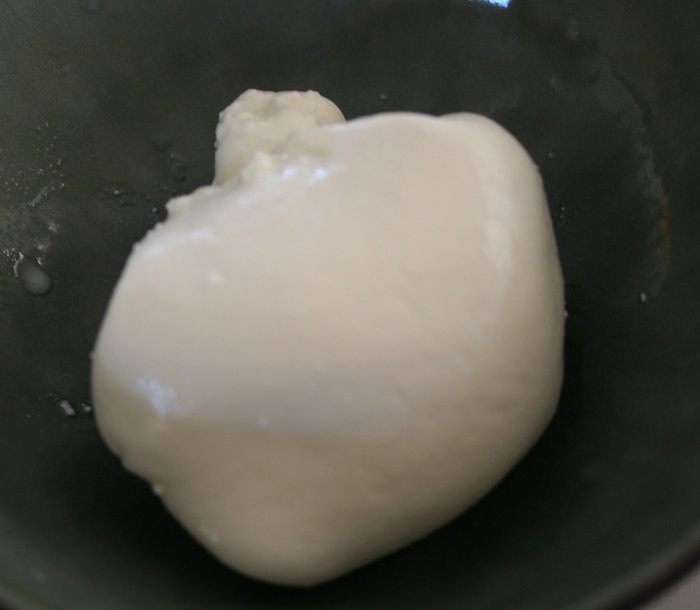
Burrata Cheese Recipe
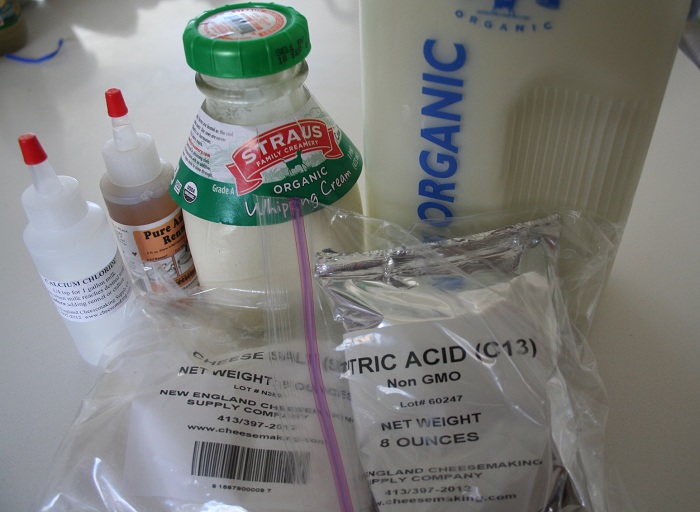
Ingredients:
- 1 gallon whole milk (I use Straus Family Creamery)
- 1/2 ts calcium chloride (omit is using raw milk)
- 2 ts citric acid dissolved in 1/2 cup cool water
- 1/4 ts liquid rennet diluted in 1/4 cup water
- 2-3 TB heavy cream (I use Straus whipping cream)
- 1/2 ts salt
Directions:
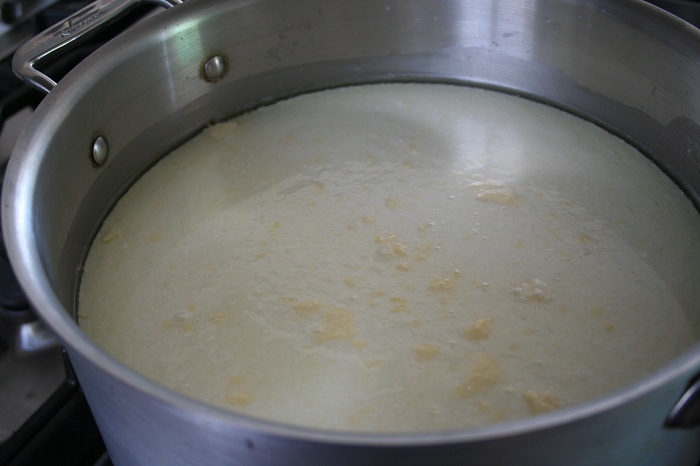
Step 1: Pour gallon of milk into heavy stainless steel pot and add 1/2 teaspoon calcium chloride directly into the milk. While stirring constantly, add the citric acid solution.
Step 2: Slowly heat the milk to 88-90 degrees (if using raw milk, heat to 100-105 degrees), stirring constantly.
Step 3: When milk hits 88-90 degrees, turn off heat and add the rennet mixture and stir 1 or 2 turns around the pot. Then let the milk mixture sit for 10-15 minutes un-disturbed.
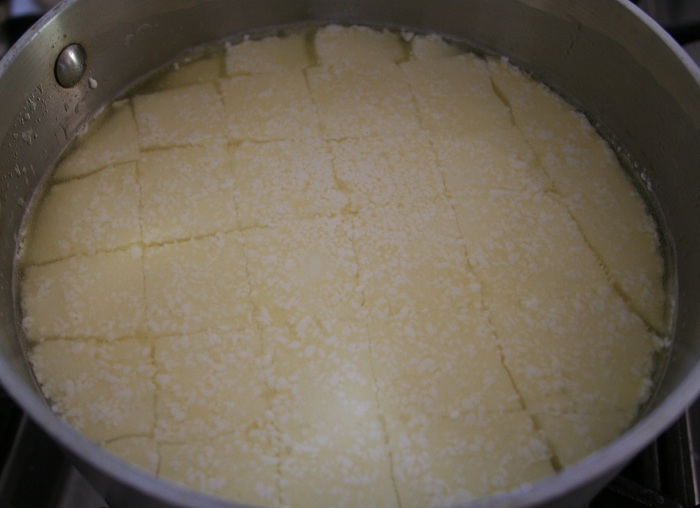
Step 4: When you see the curd pull away from the sides of the pot and seems firm (like soft tofu) cut the curd into 1 inch squares. I use a long thin knife and cut vertical strips first, then horizontally to create cubes.
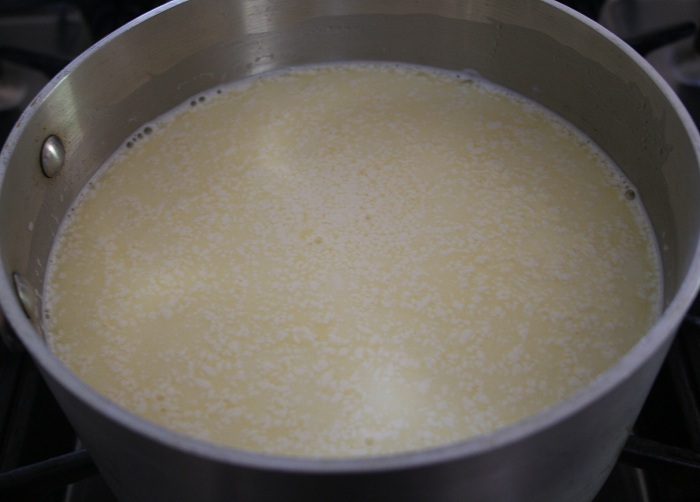
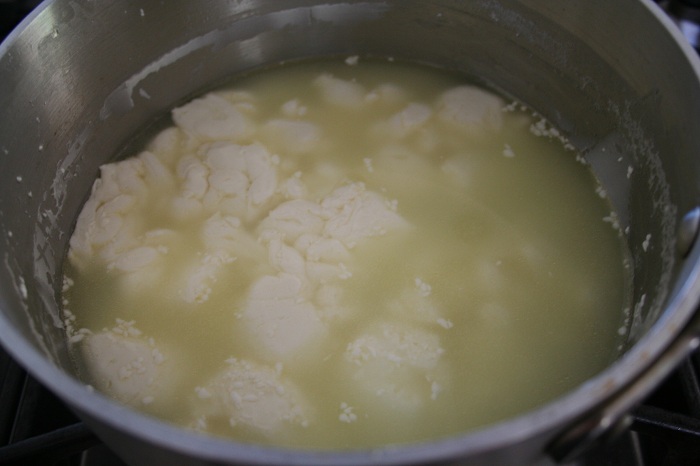
Step 5: Place pot back over medium-low heat and heat the mixture to 105-108 degrees while stirring slowly. The curds will shrink and sink to the bottom of the pot as the whey (liquid) is released from the curds. When mixture hits between 105-108 degrees remove from heat and continue to slowly stir for about 10 minutes
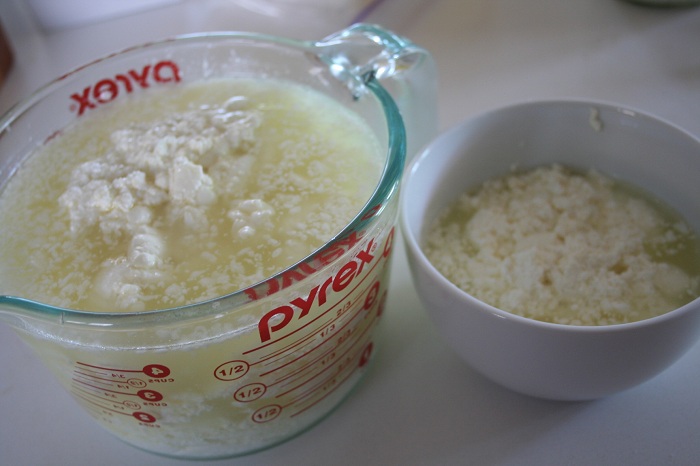
Step 6: Remove curds into a microwaveable bowl (I use a metal skimmer. Make sure mesh is not too fine or it will not drain). For the microwaveable bowl, I use a 4 cup Pyrex measuring cup because it makes it easier to pour off the whey.
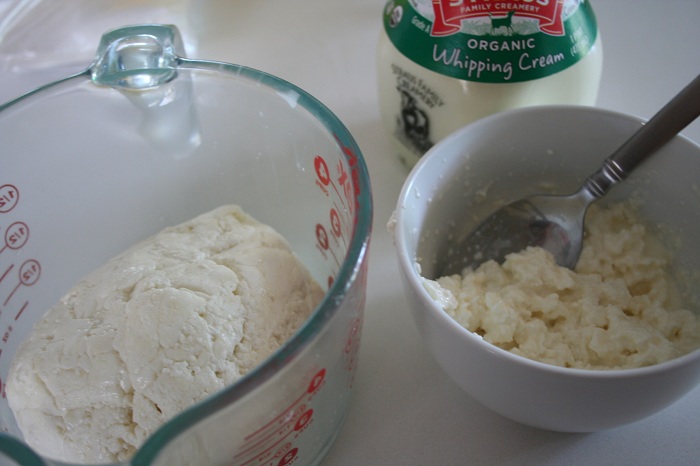
Step 7: Take 1/4-1/3 of the curd mixture (depending on how much filling you want for your rools or balls) and drain. Put in a small bowl and break the curd up with your fingers. Add about 1/4 tsp salt and 2-3 TB of cream to mixture. Stir the mixture. It should resemble cottage cheese.
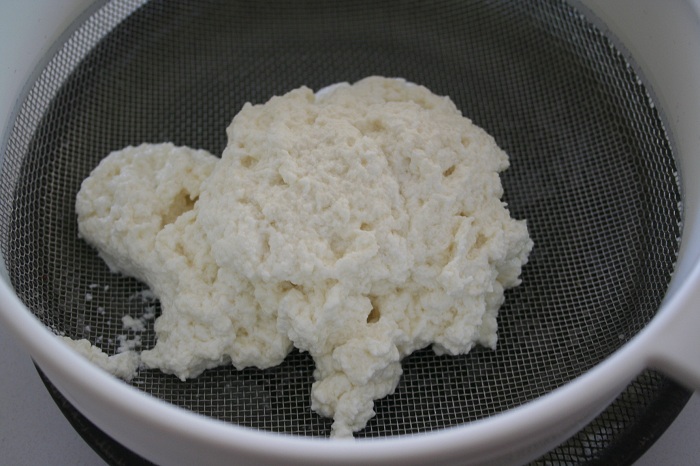
This is what the curds look like before being drained.
Drain the smaller portion of curd that will be used for the filling.
This is what the curd will look like when it has been draimed and what the curd/cream filling will look like once it has been drained, salt and cream added (on the right)
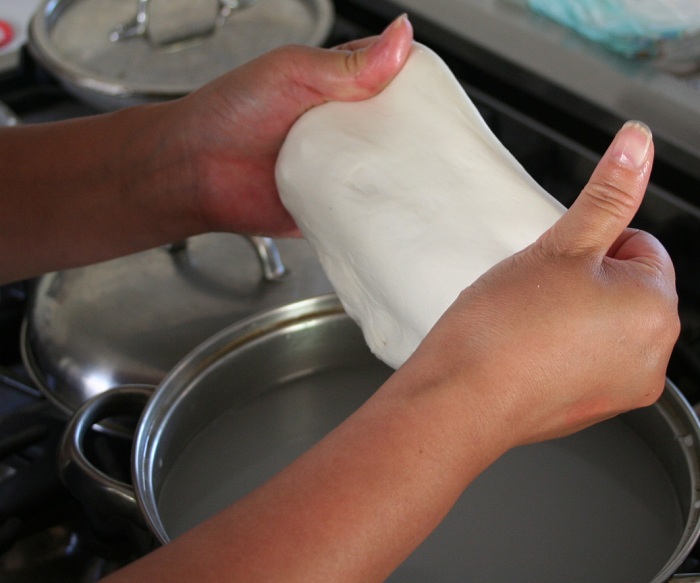
Step 8: Pour as much of the whey out of the microwaveable bowl, then microwave on high for 45-60 seconds. Continue to pout off and squeeze as much of the whey out of the curd. Tip: Do not throw out the whey. I give mine to my chickens and have read recipes where they use whey instead of water for more flavor and nutrients.
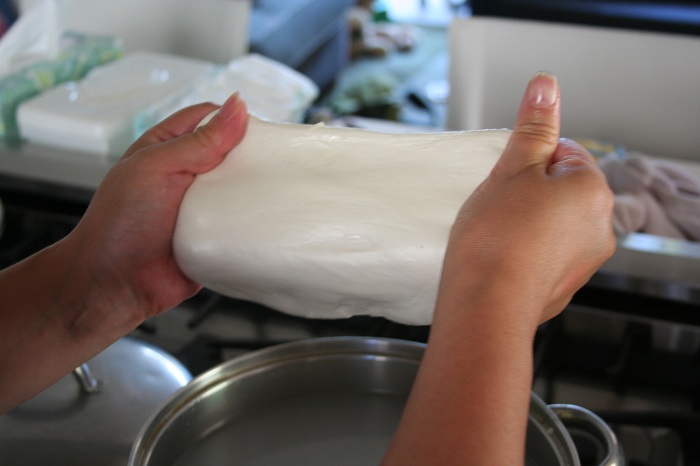
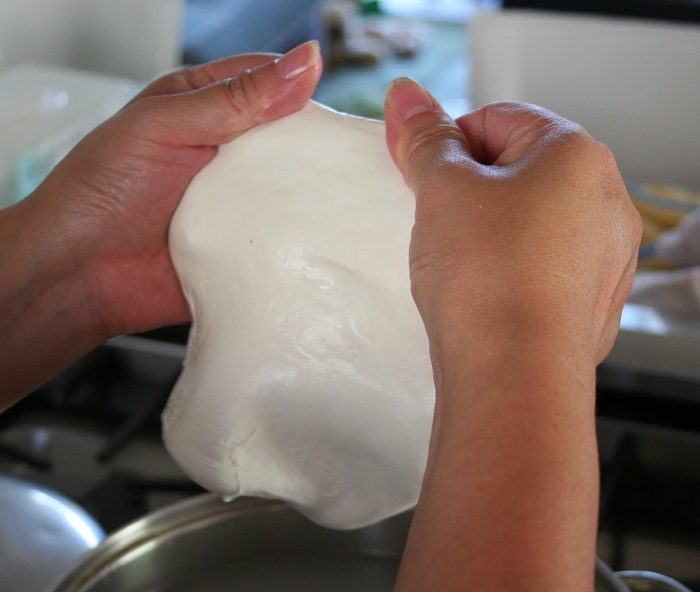
When the curd is heated and stretchy add 1/4 ts of salt and knead it like you would bread. If it is too hot at first you can use your wooden spoon. Split the mixture into 2 balls.
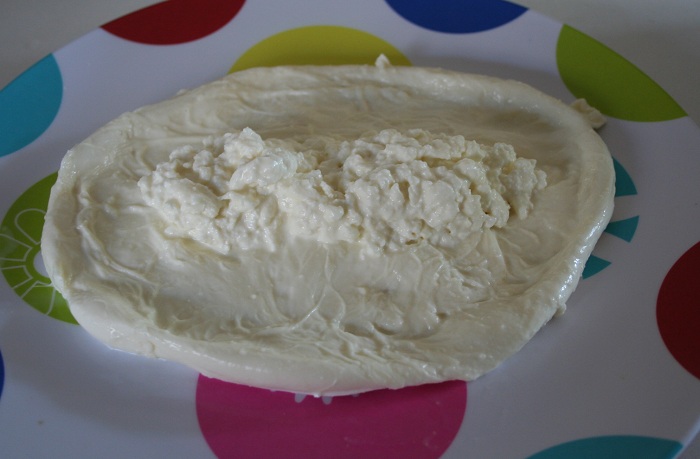
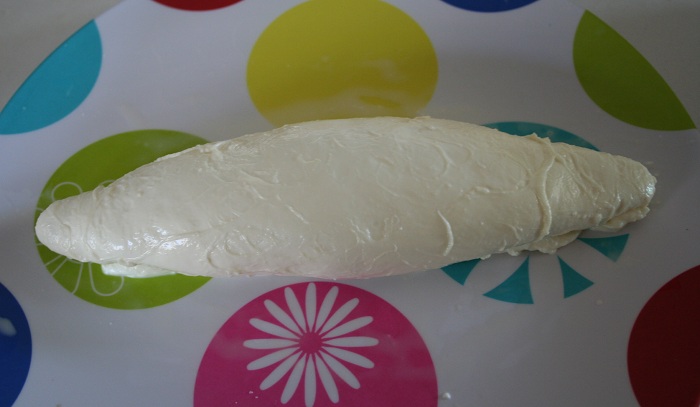
Step 9: With your first ball, stretch into a flat circle. If it becomes too hard to stretch, microwave it for 15-20 seconds more or dunk in hot water. When it is pliable again, stretch into a round shape. Put on plate and add 1/2 of the curd/cream mixture down the middle. Fold the sides up, seal the ends and put the seal side down to seal the ouch. Repeat with the 2nd ball and remainder of the curd/cream mixture.
Eat immediately or cover tightly with saran wrap and put in refrigerator to eat later.
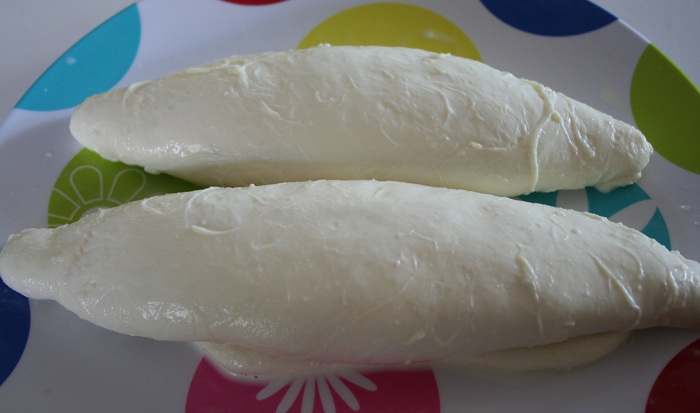
This is what the final product looks like:
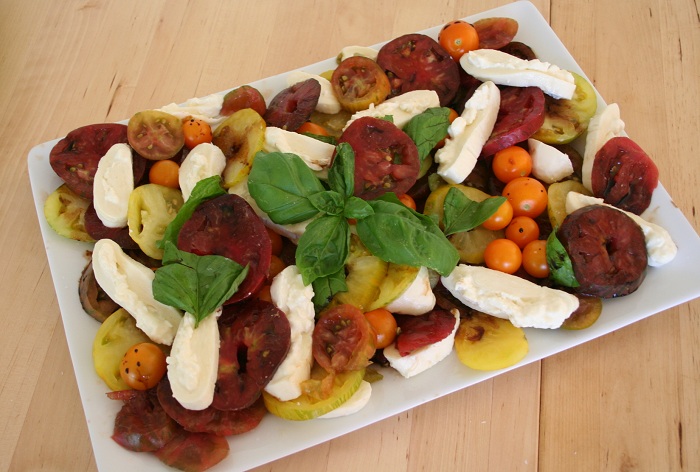
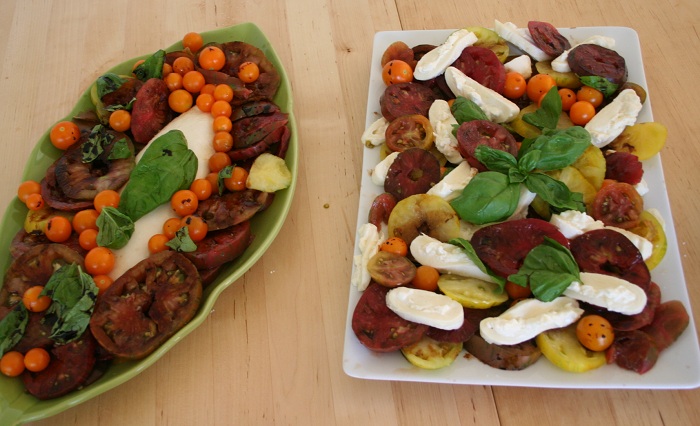
How to serve: I like to slice it with heirloom tomatoes from the garden for a great salad. Or you can just leave it whole with some crostini or crackers next to it.

Glorious! And thank you for using the BEST milk, organic hormone free in your recipe. Am doing this TONIGHT!!!
You can also make little purses by forming them in little bowls, then pinching the ends together and putting them seem side down on a plate.
Hi – thanks for sharing ;D
I was just wondering what TB of cream means? How much cream is it precisely?
Many thanks in advance!
TB on here means Tablespoon. The amount of cream will depend on how much curd you shred for the filling. You want the mixture the consistency of the picture above. You do not want to add too much cream that the mixture will be too difficult to fill the pouches but keep in mind that the curd will absorb some of the cream so that it will be less liquidy as the cheese sits.
Thanks a mill, Tammy ;D
As cheesemaking supplies are hard to come by over here on the other side of the “pond” – do you have a tip for me for a supplier that sends worldwide?
Best, Mette
Hi Mette,
Unfortunately i do not know of a good cheesemaking company in Europe. It should be easy to find the ingredients you are looking for at a health food type store. I know rennet is very readily available and read that lemon juice can be substituted for citric acid.
Mette – I found all of the ingredients on http://www.cheesemaking.com – they ship Internationally
Any advice for someone who doesn’t have a microwave? Thanks for the great pictures. They really help. Love the end results!
If you don’t have a microwave heres what you do. Scoop out all the curds and bring the whey (liquid) back up to a boil. Break the curds into small golf ball sizes and youll have to allow the curds to sit in the boiling water then continue with the kneading. Use gloves! This method is very warm.
Wow! I’d given up on finding it…a favorite local restaurant served burrata with exquisitely ripe Pine Hill peaches and basil…sublime! Now I’ll try it at home thanks to you!
I can’t wait to try this after frustrating months of trying to source this cheese. A local favorite restaurant served burrata cheese with exquisitely ripe Pine Hill peaches and fresh basil…sublime!
I am so glad you found this recipe. It is quite easy to make but is a showstopper! I am making a double batch on Friday!
I wish to buy and attend classes please advise
I live in florida or I can go to new york city
Hi Maryann,
We do not sell any courses. I just try to post on my blog to help inspire others that they can cook too!
I just want to know how long it will last in a fridge?
Hi Joy, Burrata is best when fresh so I usually make it and serve it right away or serve it the next day. I have never tried to keep it longer than that (mainly because it gets eaten pretty quickly).
Can’t wait to try this recipe. Had this cheese in Italy with fig jam & honey. Also, with warmed olives, tomatoes, oil & balsamic & S&P. Amazing!
It goes really wells with those ingredients. Try it with Grilled Figs with a Balsamic Reductions.
I’ve made this to take to a pot luck. Talk about comments! Some people have never had fresh cheese. At first they are unsure, but after the first bite…..nothing but gushings!
@Jeanette, thanks for sharing. Be careful, once you bring homemade Burrata to pot lucks, everyone is going to start requesting it 😉
I wish your blog was set up on Pinterest, I would like to save this for future reference.
Hi Bonnie,
Actually there is a little ‘pin it’ button at the very bottom of the content of each post that you can use to add the images to your pinterest account. Enjoy!
Is the calcium chloride use as a preservative? Can you miss it out? Or is it necessary to make the recipe work?
Hi Nick, calcium chloride is not used as a preservative in this recipe but instead to help the milk curd better. You can def. omit it.
Thanks!
Jeanne asked in March, 2012 how to proceed if you don’t have a microwave and I would also love to know what you’d recommend. I’m anxious to make some after seeing it on one of my cooking shows today.
Hi Mary Anne, I must have missed Jeanne’s post. If you do not have a microwave, you can just use boiling water to bring the curd up to a higher temperature and help it to “melt”. The process takes longer but that is how it has been done for ages.
Tammy thank you for this recipe. I made it and found some problems. First my curds were very small and I think I overworked the first one! It became a little to crumbly and then I rolled it and filled it. My second problem was when I tried to keep it in the brin it solidified and the buratta center was no longer creamy after only about an hour in he liquid. How to you keep it till you eat it? Also it only rendered 3 buratta balls that were about the size of a medium peach is that right? Thank you
I make a lot of mozzarella at one time so I buy 42 pounds o milk curd at a time to make it. For your recipe I took the milk curd, broke it into small piece and then added hot water to soften it before adding the heavy cream. When it was done it looked exactly like the picture in your. recipe. I then continued just like your recipe and while the Burrata came out good it was not as creamy as the ones I buy in the store. Am I doing something wrong>. One last question. With your method, how many pounds of mozze3rella do you get with one gallon of milk?
Thank You
Maybe try not to soak the the curds in water and instead soak the curds in cream. The curds really absorb the cream so I make the mixture extra liquidy knowing the curd absorbs so much of the cream.
I have not weighed the Burrata but 2 large loaves.
I recently had Burrata for the first time at a little off the beaten path restaurant in Rome. I could not believe I lived this long and never tasted it before. Their’s looked a little different. There was a lot of creamy sauce and lots of slips of thin mozzarella, not slices, it was served with the cherry tomatoes and the best olive oil sprinkled over it. unbelievably delicious. Did they add
continued. sorry Hit the wrong button. the mozzarella was so tender and thin. What do you think they did to achieve that? Just add more cream when serving? Thanks for your recipe, I’m definitely trying it.
Most likely they just made the pouch thinner and added more cream. If you did not want to form the pouch you could probably just shred the mozzarella and add cream to it…
We are visiting in the south of Italy (Bari) and have bought wonderful burrata in a tiny store that only makes burrata and a few other mozzarellas. I Googled “burrata how to make”, not really expecting to find much, and was delighted to find your site. (It comes up #1 on Google, by the way.) Will try it as soon as we get home. Thanks for a GREAT post!
Hi Frank,
Let me know how it works out for you!!
I followed directions exactly and never saw curds that could be cut. In the end I had one small baseball size ball and never elastic. Any thoughts appreciated.
Hi Nancy, the milk may have been heated too much or too little or not enough time for the curd to set. There are a variety of reasons why the curd didn’t set. Can you explain what happened to the curd?
I just found this “how to make burrata” post. I love burrata so had to give it a try. I was very careful about the temperature and times but large curds never formed. I was gentle while stirring but ended up with pile of curds probably about half the size of a grain of rice. They wouldn’t adhere, kneading was impossible.
Any thoughts on what I should try next?
It is ok for the curd to be small because you can drain them with a fine colander (like pictured above). Once you put it in the microwave (or use really hot water if you do not have a microwave) the curd should sort of melt like plastic and come together. It is hard to describe. It does not look like the curd is going to come together but the high heat helps. This is step #8 from above. Let me see if I can find some documentation that explains it better.
Are the temperatures in fahrenheit or centigrade?
Ok – tried it again (used Strauss milk this time) and worked great. I clearly did not heat the curds long enough (took them to about 150F in the microwave this time) and everything came together.
In response to Robert Most – temps are in Fahrenheit
Dave, thanks so much for following up. I am so pleased that it worked for you. I try to use more natural milks when making cheeses. I am going to try raw milk soon 🙂
In response to Nancy, this recipe will not work if you use ultra pasteurized milk. Regular pasteurized is fine, just not ultra. It’s hard to find organic milk that isn’t ultra pasteurized. Organic Valley makes both, but again, hard to find, even in NYC. The best milk would be raw, fresh from the dairy, but selling raw milk is illegal.so unless you have your own cow…..
I live in Canada and our gallon is different, it has 16 cups, while I think that the American gallon has 20 cups. My question is when you say a gallon of milk, are you using 20 cups of milk?
Thanks,
Colleen
Can vinegar be used to curd the milk??
Its interesting you have calcium chloride in your recipe. I bought a small bottle of it, and my bottle says “not recommended for cheeses that require stretching”.
Please let me know if you’re looking for a author for your site.
You have some really great articles and I think I would be a good asset.
If you ever want to take some of the load off, I’d love to
write some articles for your blog in exchange for a link
back to mine. Please shoot me an e-mail if interested. Many thanks!