100 Year Old Olive Tree Installation
We decided to purchase a mature tree for the centerpiece to our front yard landscaping project.
Here are the steps we took
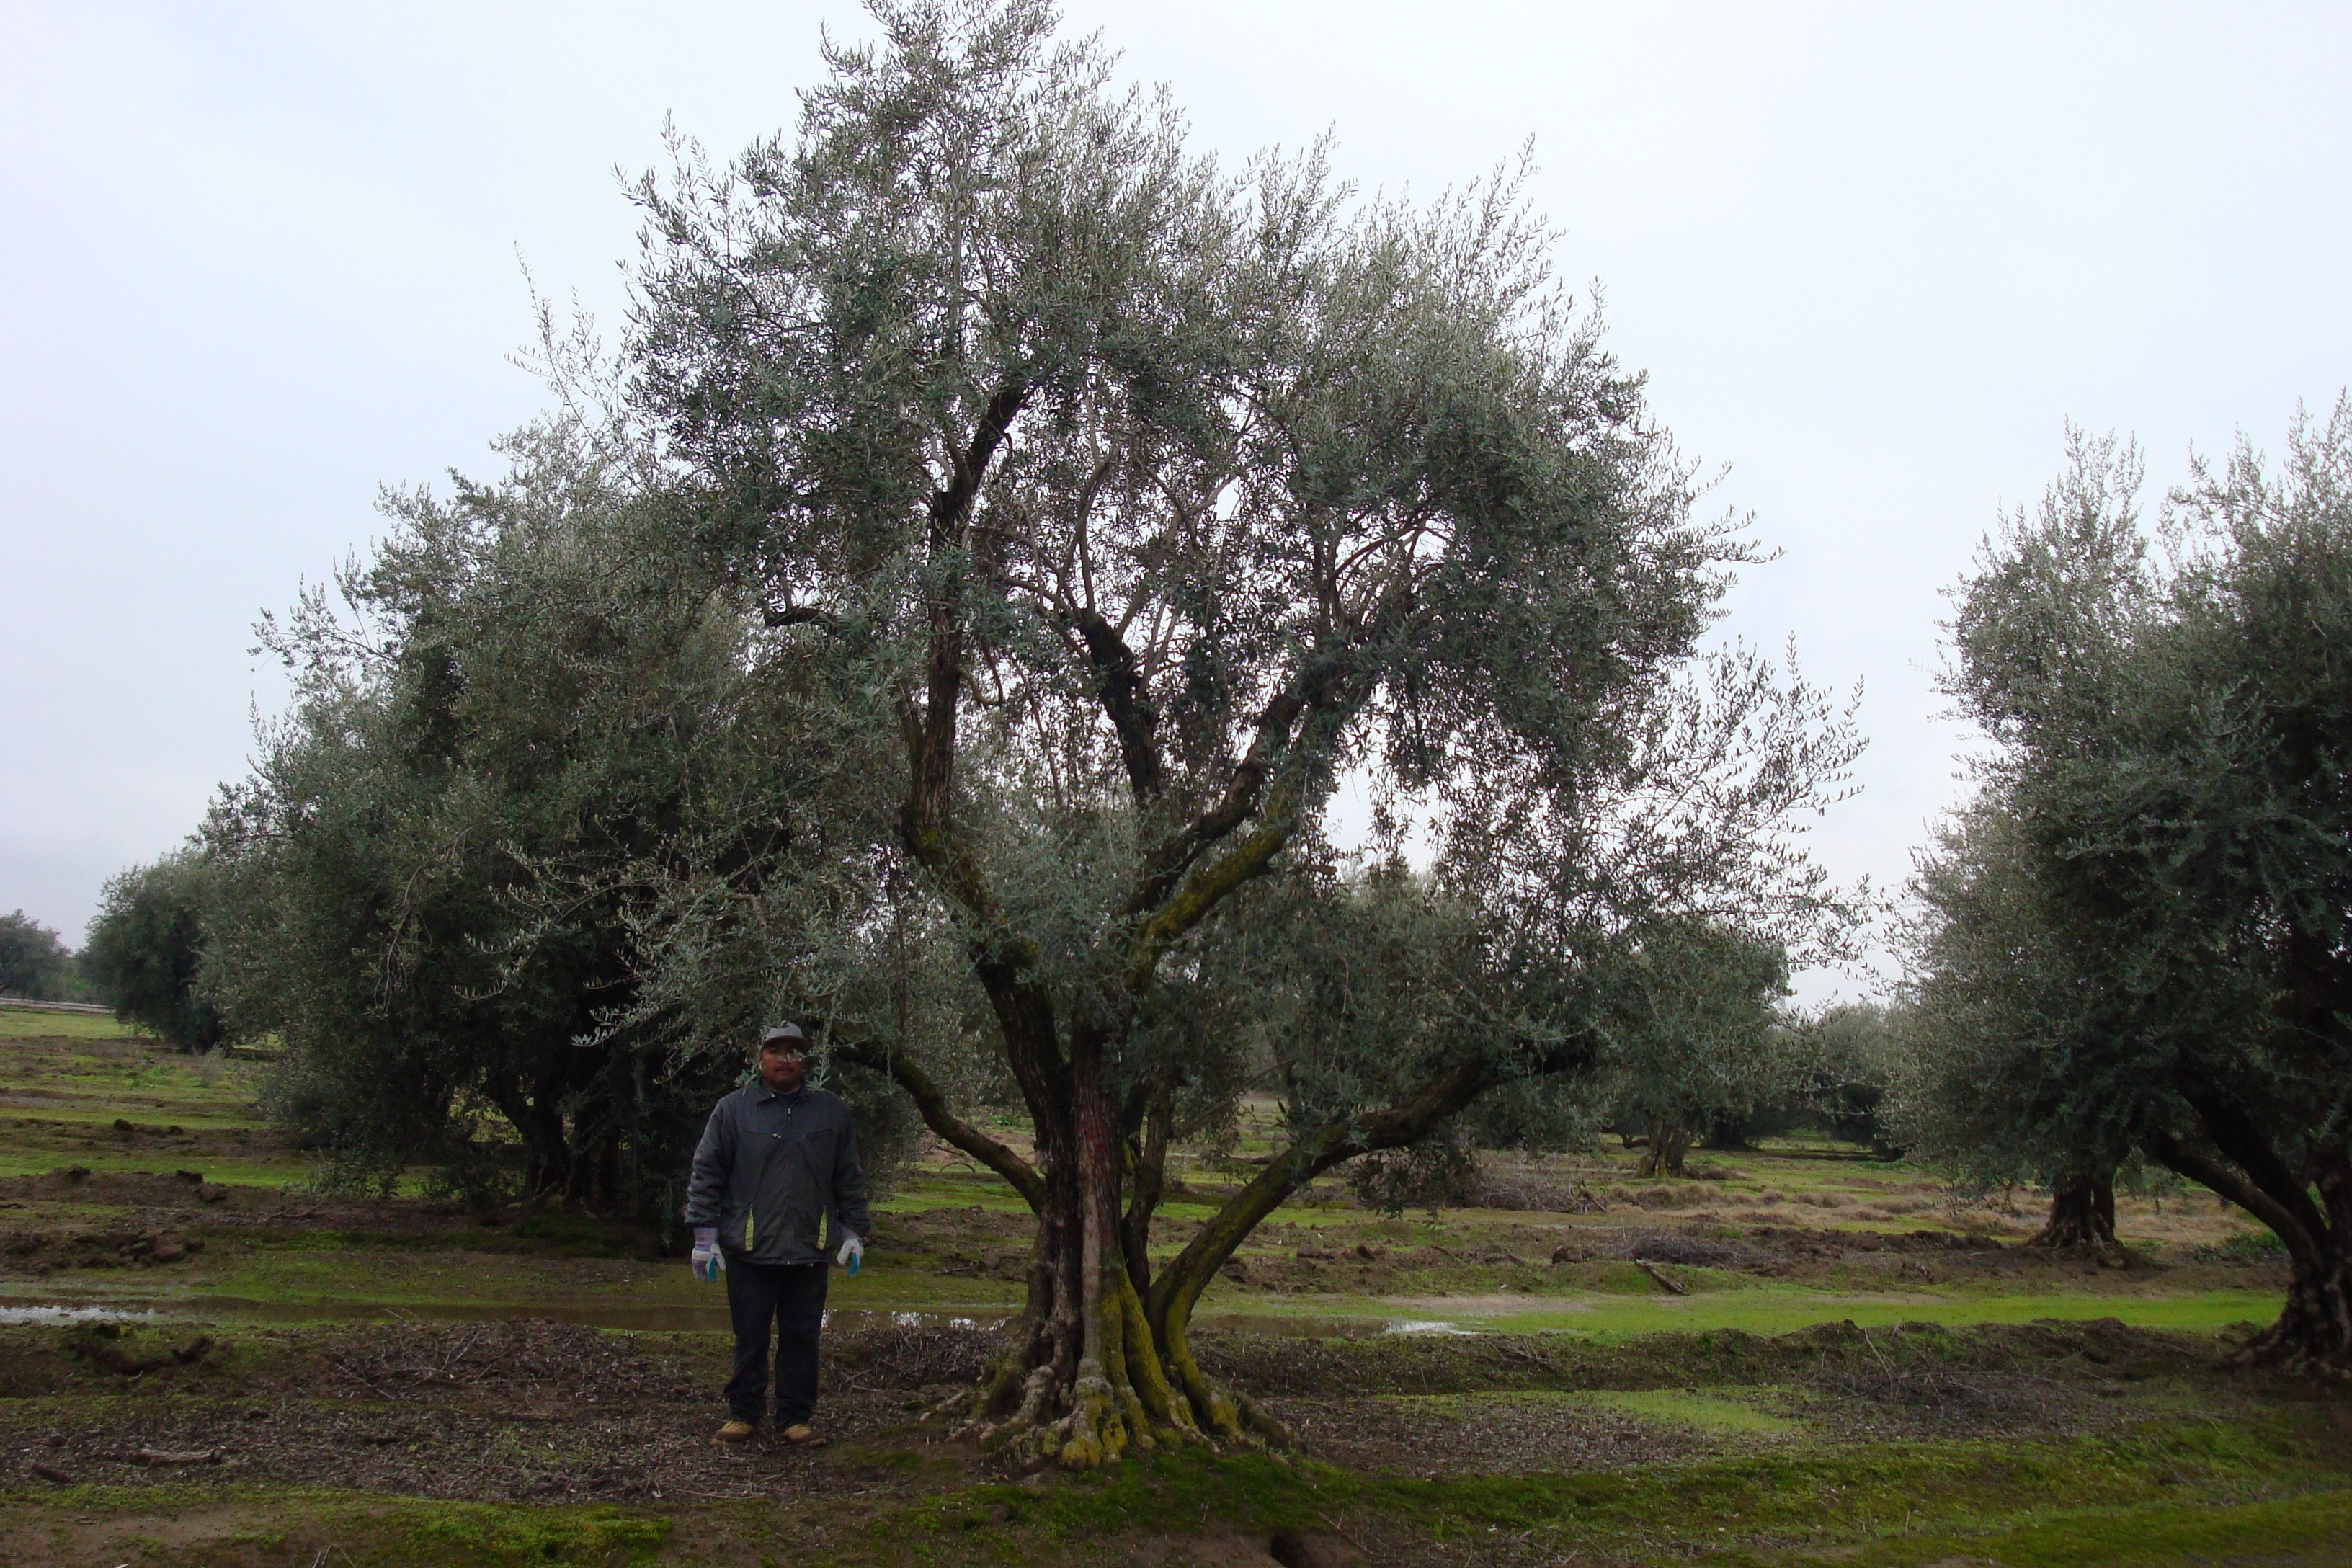
1. Locate a tree that appeals to your taste; mature olive trees are plentiful in old orchards all over California, and the transplant very well due to their hardiness. We recommend www.urbantreefarm.com as an established and trusted tree dealer. You can contact them and have them send you several pictures of trees to choose from. We also contacted www.ancientolivetrees.com, www.amazingolivetrees.com, and www.olivetreefarm.com. We ended up going with a tree from Urban Tree Farm based on their reputation, reasonable prices, and the quality of their trees.
Here is the picture they sent us of the tree we ended up choosing:
Once we decided on our tree, we paid for it and scheduled a delivery date.
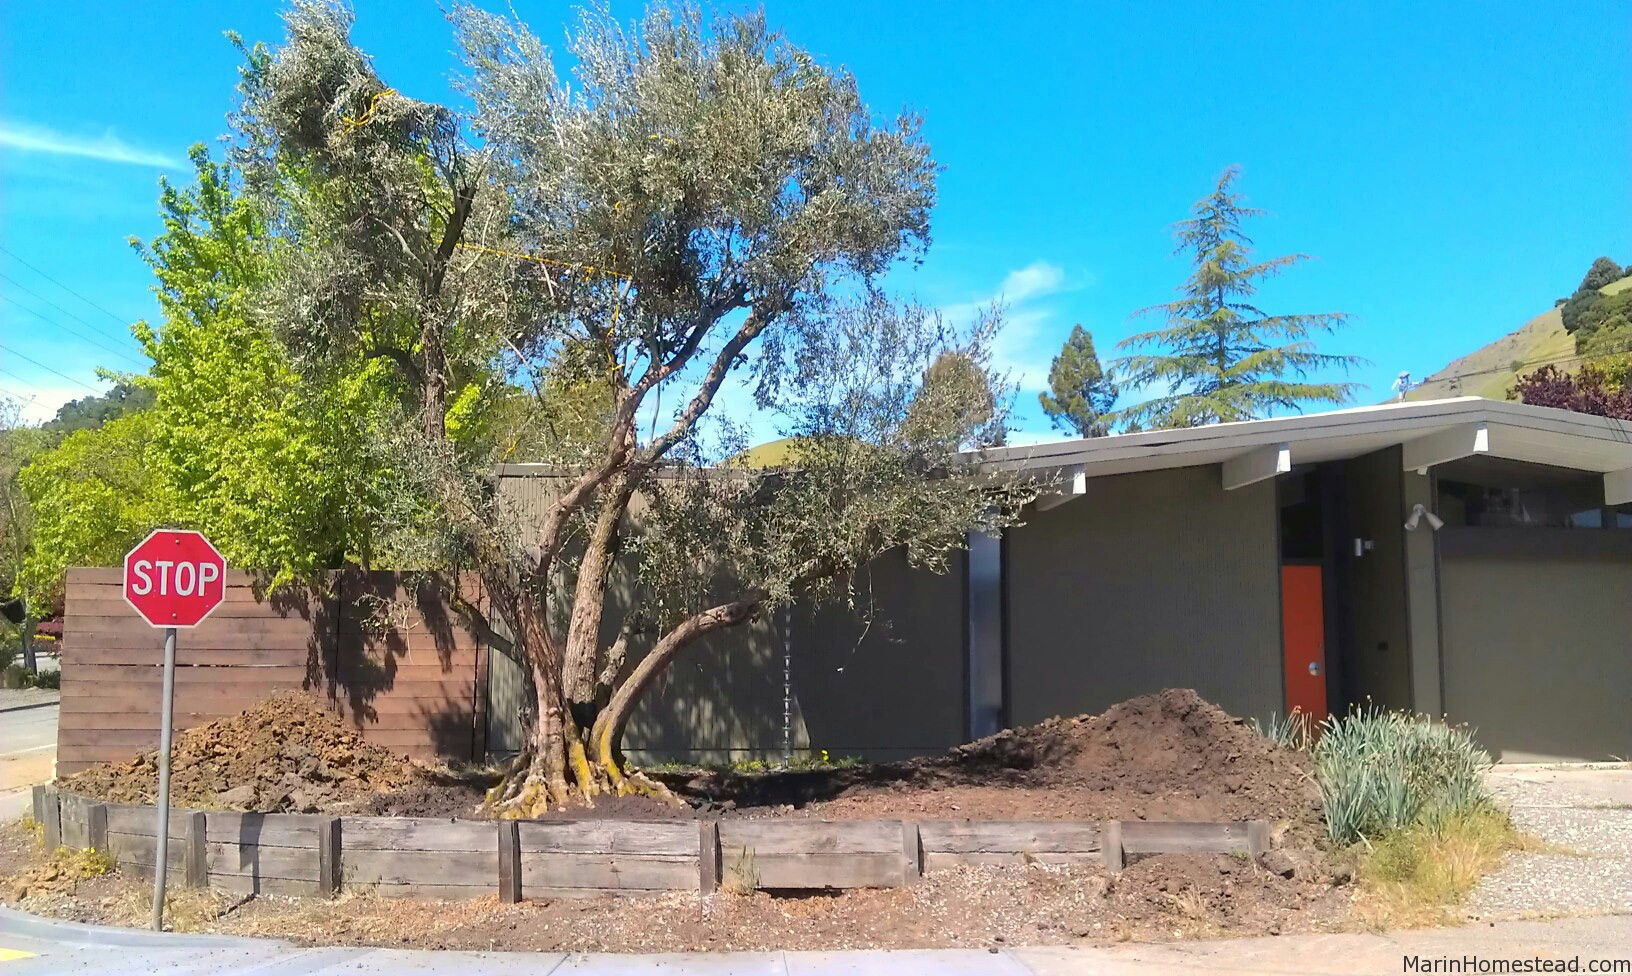
2. Once you Decide where the tree should go, and dig a hole there – ours required a hole about 10 feet in diameter and 30 inches deep. You can hire a backhoe operator to dig the hole for you, or dig by hand with a shovel. I dug ours by hand little by little over the course of a few weeks. When the tree arrived, I measured the root ball while it was still on the truck and discovered that it was thicker on one side than the other, so I had to quickly put a bunch of dirt back in the hole, and ‘grade’ it to accommodate the uneven root ball so that the tree would be level once in the hole.


3. After considering several options for moving the tree from the delivery truck (big rig truck) into the planting hole, we decided on hiring B & S Crane Service who showed up with a 30 ton crane to move the tree from the truck into the hole that I had dug:


We ended up lifting the tree and adjusting the dirt underneath it a few times before we were satisfied with it’s positioning.
4. Once it was in the hole, I cut off the metal cage and burlap from the top and sides (it was left in place on the bottom and will decay over time.) Then filled in the sides with dirt and watered well.
It has lived in mostly clay soil for the past 100 years, now it is in a more well draining and balanced soil so we should see some nice growth in a year or so after it has established some new roots.
5. Next install a drip irrigation system around the ‘drip line‘ of the tree – that just means approximately where the circumference of the tree canopy is. You should water daily for the first several weeks to ensure the rootball stays moist as it will have no other source of water until it’s roots have had a chance to grow into the surrounding soil.
6. Enjoy your new mature tree and the shade it produces, and in our case, make good use of the olives that it produces. Come back for posts about that in a year or so..
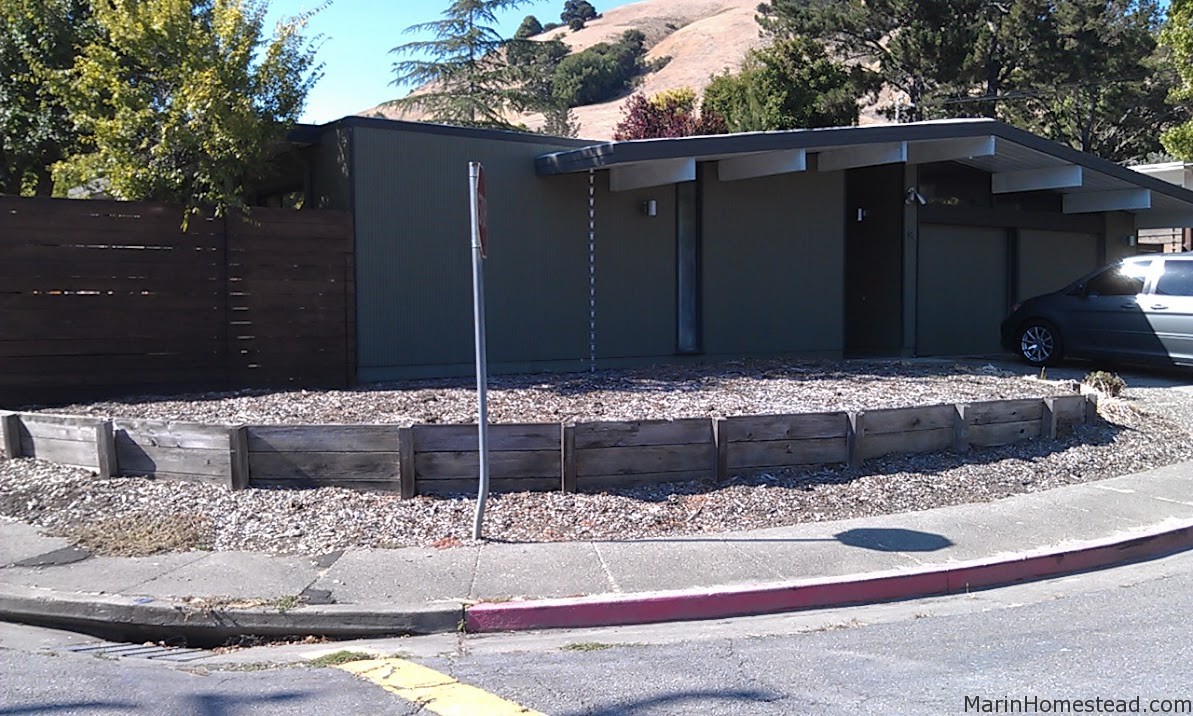
Before:
After:
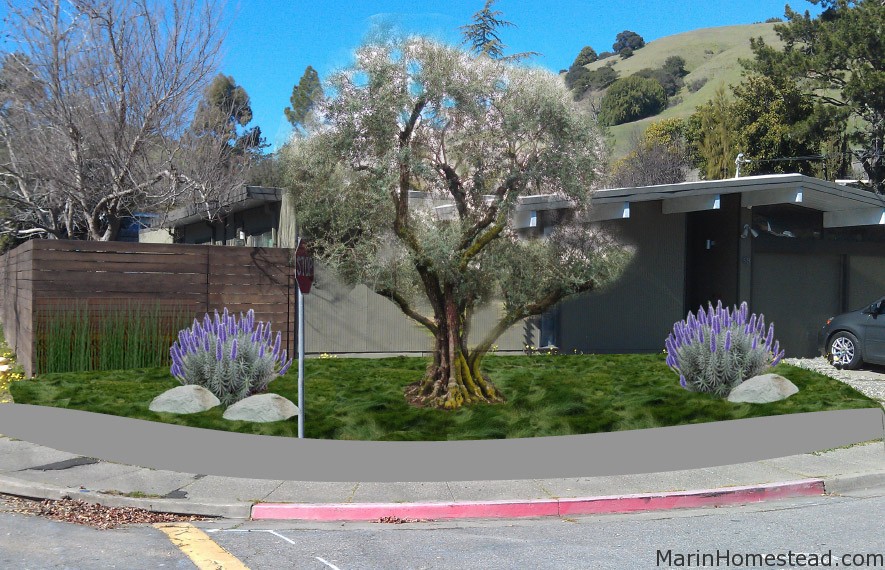
Here is a mockup I did in photoshop of how our front yard will look eventually after we install a new retaining wall and some no-mow ‘field grass’ fescue. I created this using the picture at the top of this post before the tree arrived so I already knew how I wanted the tree postitioned and which side would be facing the street. It was easy to spin the tree around just before it was set down in the hole:
Update:
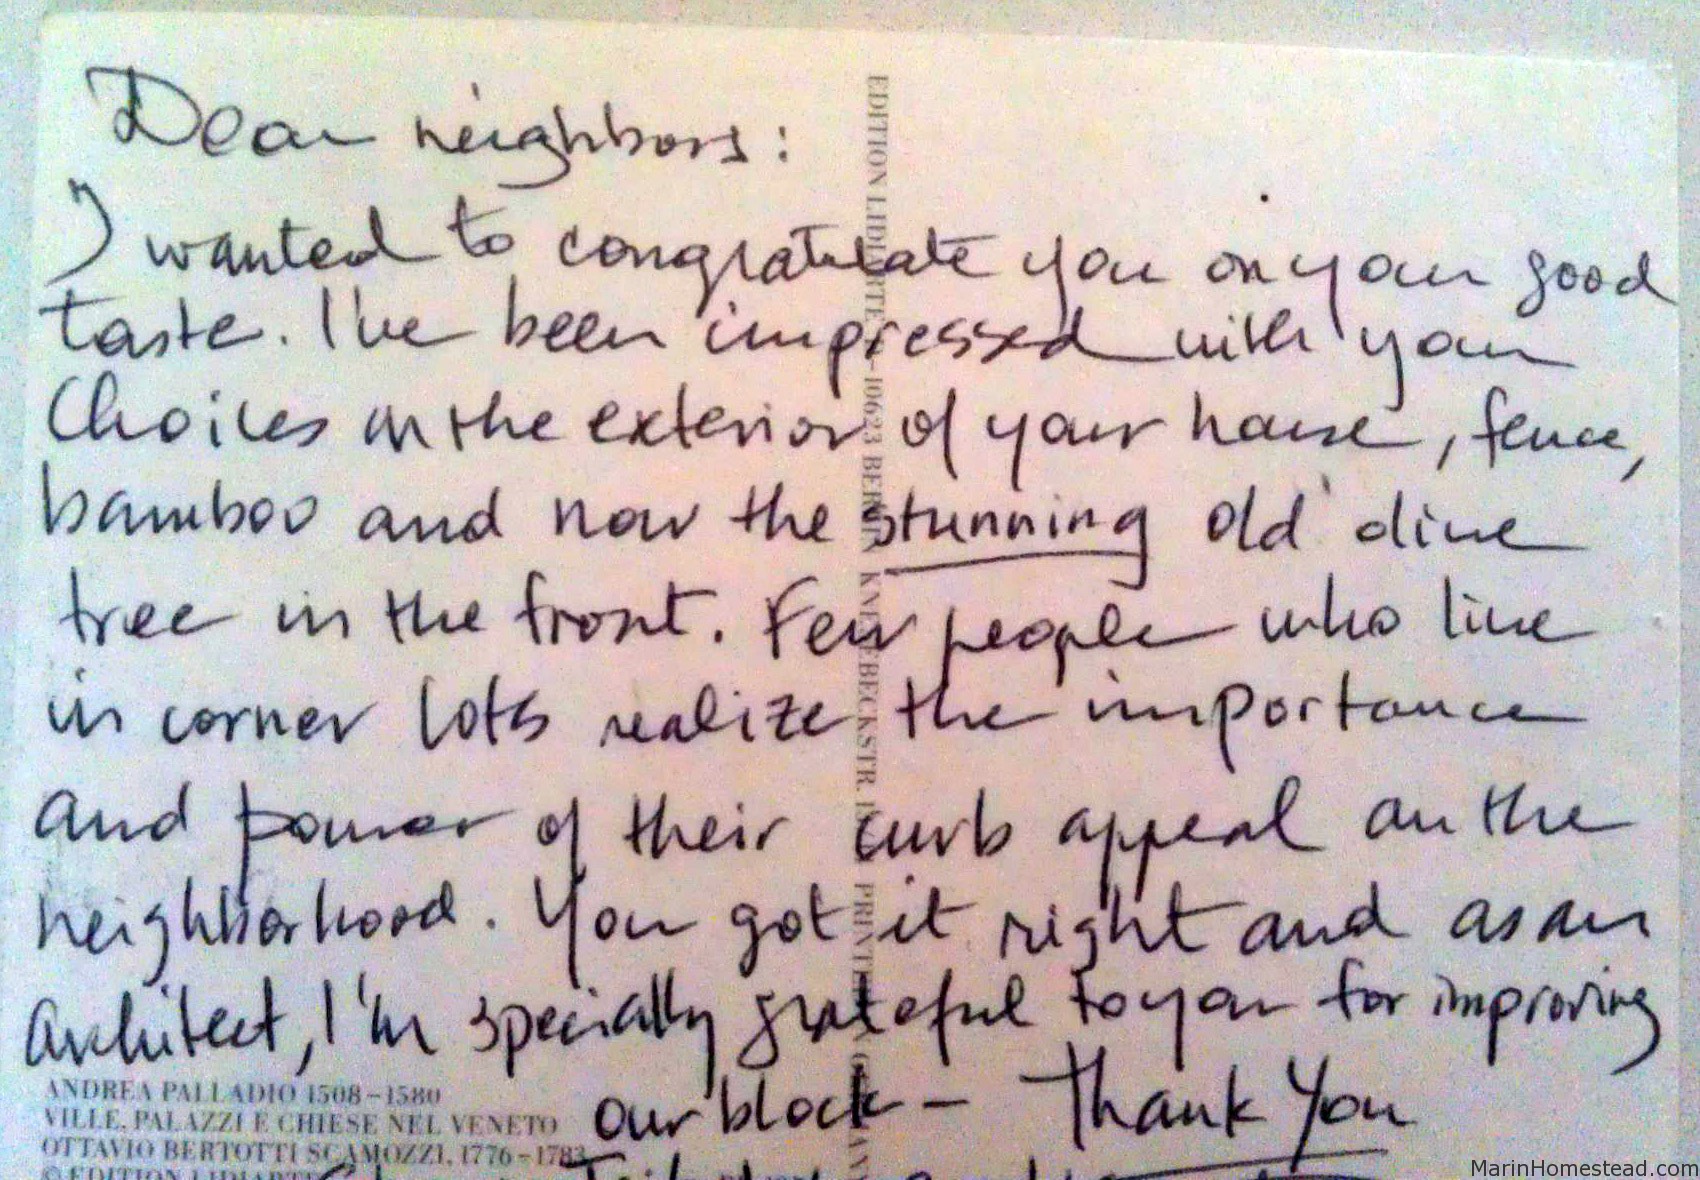
The day after the tree was installed, we received this very nice note from one of our neighbors. Thank you. 😉

Now that’s dramatic! So beautiful, so exciting, will be so interested to watch the progress. Love it.
that would have been something to see. honestly, steve, you make everything look so easy. hard to believe that tree just landed there. looks like it has been there forever. believable. so, tammy, i am in line for a jar of the first olive harvest!!!!!!!!!!!!!!!! yowza. i love you.
It looks beautiful! And olive trees are so versatile…they look pretty AND they produce! Love the note from your neighbor….it’s always nice to get validation from our choices. Can’t wait to see olive recipes!